
This idea felt kind of insane and took a few tries to get right, but ultimately, I can say that these marshmallows were worth every single bit of that. The base of the marshmallow is so perfectly fluffy, with just a bit of chew, and when we fold in the melted butter, you get all the wonderful nutty toastiness in every bite.
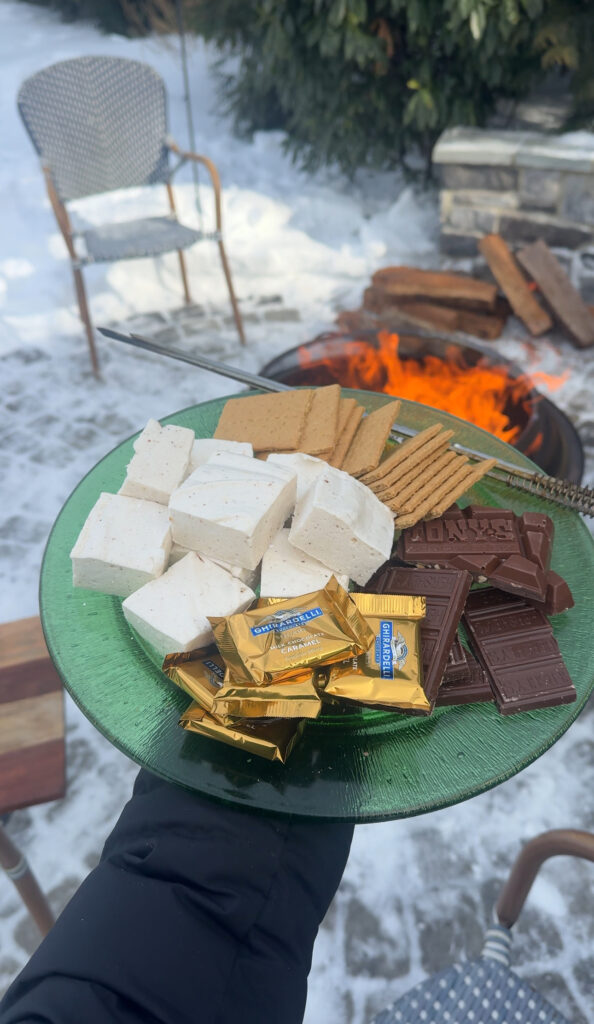
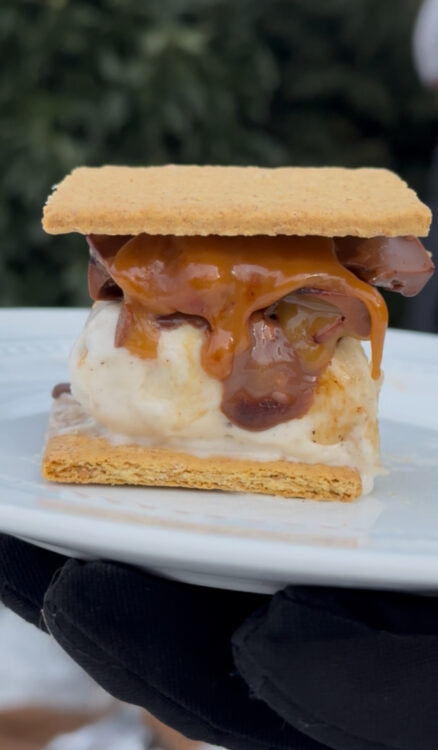
Of course, I recommend you use these for brown butter marshmallow s’mores with salted caramel, but that is because I have zero self-control. The possibilities are truly endless with this recipe. I think next I need to turn this idea into a frosting but stay tuned. For the original marshmallow recipe, check out my classic mallows here.
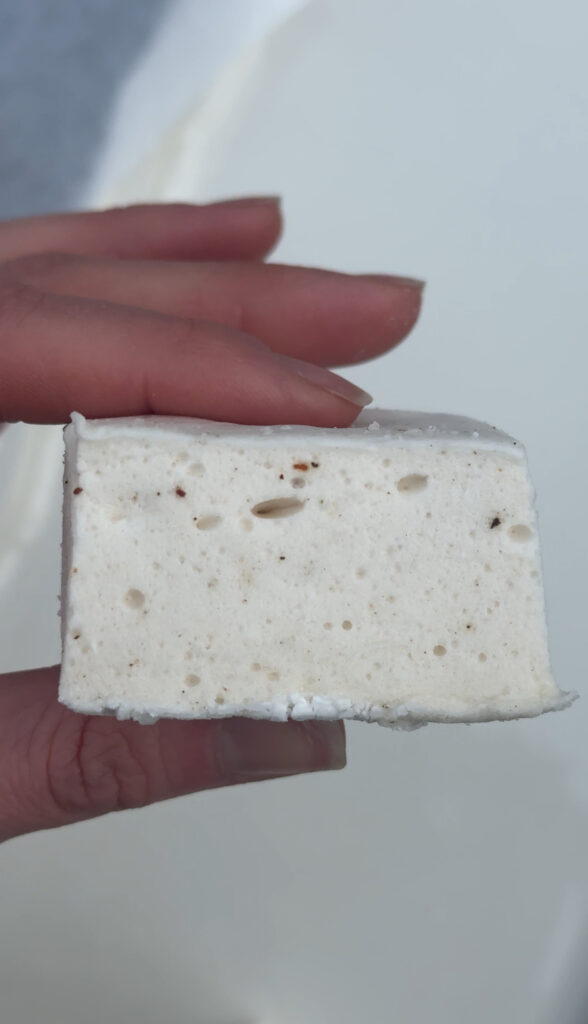
Browning the butter adds a toasty, nutty depth that turns a very sweet, very nostalgic treat into something way more interesting. Think cozy vanilla, caramelized milk solids, and that subtle savory edge that keeps you going back for s’moreeee- get it?
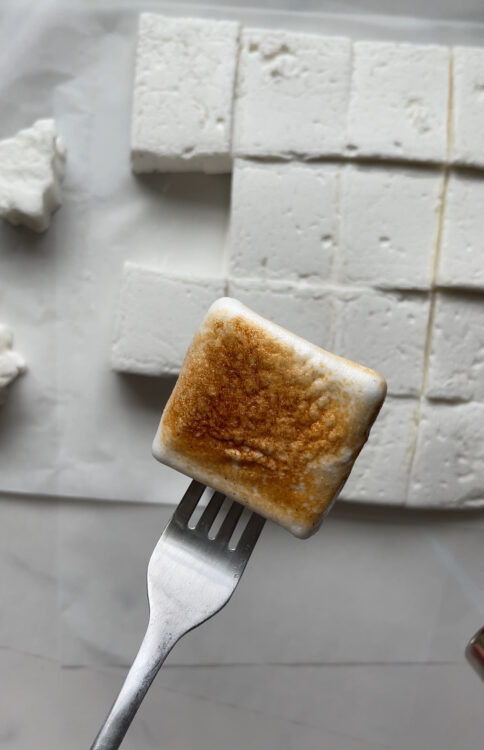
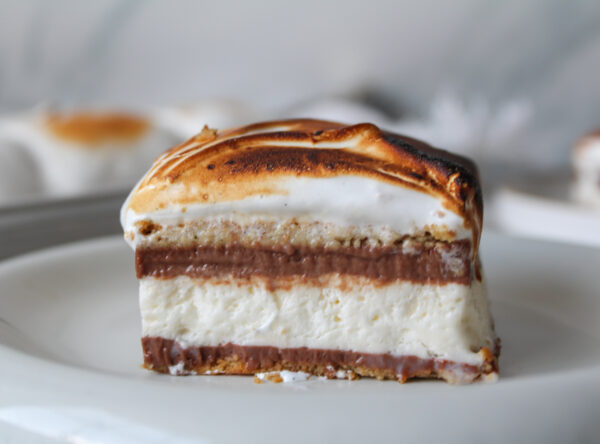
These are soft, fluffy, and honestly hard to stop eating straight off the cutting board. They melt beautifully into hot chocolate, toast like a dream, and make s’mores feel like an upgrade instead of a project. If you’ve ever made homemade marshmallows before, this is the version worth coming back to.
Do I need a candy thermometer to make homemade marshmallows?
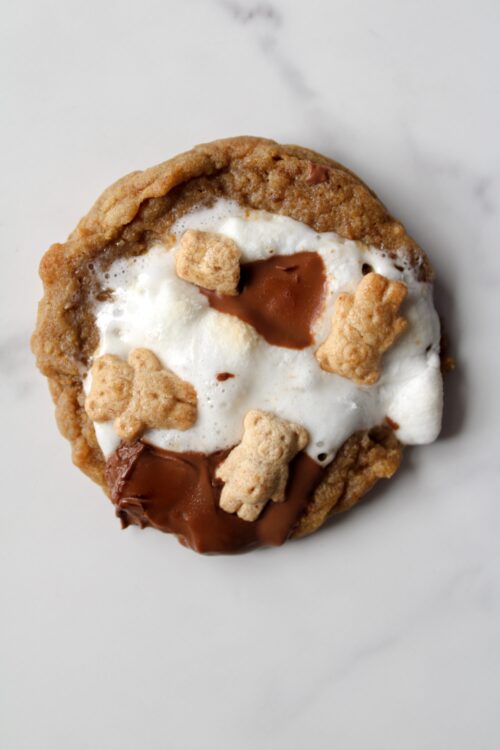
Unfortunately, yes. Getting the temperature right is key to marshmallows having that perfectly pillowy texture. Make sure you follow the recipe and heat the sugar syrup to 250°F, then let it cool to 212°F before whipping. If the marshmallows have a strange texture, it’s almost always a temperature issue. I use this candy thermometer, and I cannot recommend it enough! If you are looking for a unique s’mores-themed dessert but don’t have a candy thermometer, try my insanely good s’mores cookies.
Brown Butter Marshmallows
Video
@lilypcrumbs Making brown butter s’mores with my dad! Homemade Brown butter marshmallows make these so nutty and caramely and perfect. Also, of course the best s’mores creations mean @Ghirardelli Chocolate Company and @Honey Maid . #brownbutter #homemademarshmallows #smores
♬ Nice ‘n’ Easy – Frank Sinatra & Alan Bergman & Marilyn Keith
Ingredients
- 2 envelopes of gelatin 1/2 ounce
- ½ cup cool water 4 ounces, (to bloom gelatin)
- 1½ teaspoons vanilla extract
- ½ cup water for the sugar syrup, 4 ounces
- ⅓ cup plus 2 tablespoons light corn syrup 5 ounces
- 1¾ cups granulated sugar 12 ounces
- 1/2 teaspoon Diamond Kosher Salt
- 10 tablespoons unsalted butter 141 grams, browned and still liquid but cool
- ⅓ cup powdered sugar for lining the pan
Instructions
- Grease an 8X8 baking pan by with softened butter and line on top of the butter with parchment- we need extra non-sticky power! Set aside.
- Make the marshmallows- In a small bowl, add 4 oz water and vanilla bean (or vanilla extract if that is what you are using). Sprinkle gelatin on top.
- Add the remaining ½ cup (4 ounces) water, corn syrup, sugar, and salt in a 3-quart stainless steel pot and set over medium heat.
- Stir mixture with a fork until bubbling, about 5 minutes, then increase heat to medium-high. Clip on a digital thermometer and cook, without stirring, until the clear syrup registers 250°F, about 5 minutes.
- Transfer the thermometer to the bowl of a stand mixer and pour in the hot syrup all at once, scraping the pot with a heat-resistant spatula. Cool to exactly 212°F, about 6 minutes. Add gelatin. With the whisk attachment, mix on low speed until gelatin is melted, then increase to medium-high and whip until thick, snowy white, roughly tripled in volume, and beginning to ball up around the whisk, about 10 minutes. Reduce the speed to low, add melted browned butter, return to medium-high, and beat for a few seconds more.
- Scrape the creamy marshmallows into the prepared 8-inch square baking pan, spreading it into an even layer. Cover with foil and refrigerate until firm, about 2 hours (or let stand overnight at room temperature).
- Sift some powdered sugar over the marshmallow, invert onto a cutting board, remove from the pan. Sprinkle a bit more powdered sugar over any particularly sticky parts, then use a large chef’s knife to cut into marshmallows, you can make them as big or as small as you would like.
- Transfer to an airtight container, with wax paper between each layer. Store for up to 2 weeks in the refrigerator, or freeze for up to 6 months.

Rate This Recipe
What did your think?